
Build edge data into your apps
Learn how to store and retrieve key-value data at the edge by building a basic hit counter in a serverless Fastly Compute app.
With Compute, you can store key-value data that is globally synced across the Fastly network and accessible in your services for reading and writing. In this, tutorial we'll learn the basics of using Fastly KV Store to make a simple page hit counter with a Compute service.
Your Compute app runs between the user and your origin website, so it can manipulate requests to your site and the response you send back. We'll build a JavaScript app that listens for user requests, updates a data store with the page requested, and returns the response to the user. We'll also build a stats page to show the number of hits on each page.

NOTE: In this tutorial, we're making a very basic hit counter to learn how to use an edge data store, but it's not a suitable solution for robust analytics on a large scale website. Fastly's Observability dashboards are better suited for gathering insights into your traffic as it's delivered at the edge.
In this tutorial, we'll use the Expressly router which supports similar structures to server side Node.js frameworks like Express and runs on the Fastly JavaScript Compute SDK. We'll compile our JavaScript to Wasm (Web Assembly) and deploy it to run as a serverless app on the Fastly network wherever your users are.
Prerequisites
To follow along with the tutorial, make sure you have the following:
- A Fastly account and API token
- Node.js installed on your computer
- Access to GitHub for the starter kit and example website
Set up your website
If you already have a website you want to use with your hit counter, all you need is its address to create your Compute service.
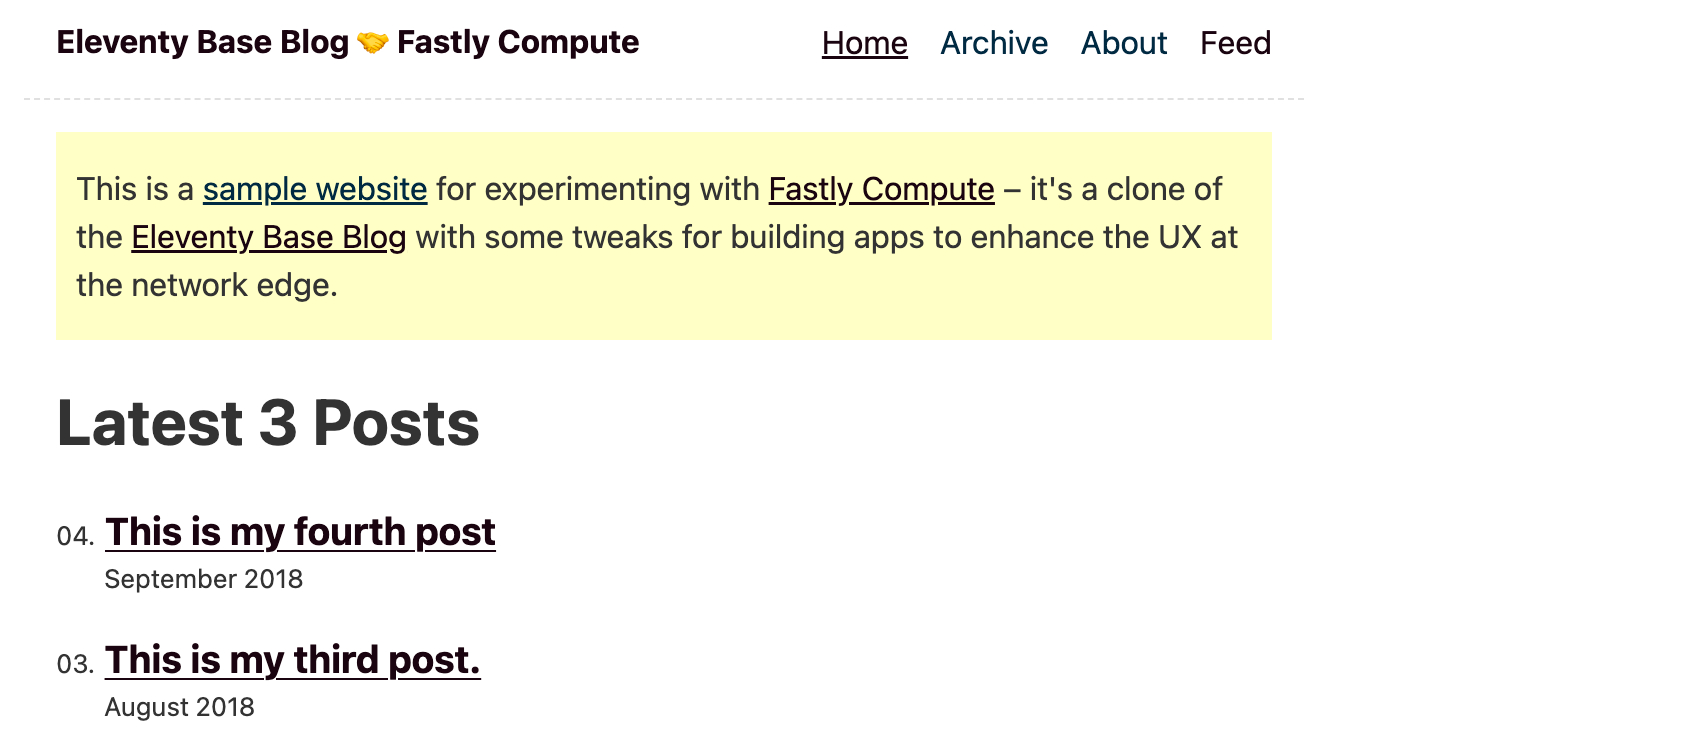
If you don't have an existing website but want to try the hit counter app, you can still follow this sample code, which uses a clone of the Eleventy Base Blog. A few notes on this cloned site:
- The repository includes more information about the site: github.com/glitchdotcom/my-site
- The site is deployed to GitHub Pages. We can use this as the default
backendfor our service: glitchdotcom.github.io/my-site/
If you'd like your own copy of the sample website to edit as you work on your Compute app, you can clone the repository and follow the steps in the README to deploy it to GitHub Pages. When you've deployed your cloned site, use the address of your GitHub Pages site in your Fastly service.
Set up your Fastly account
Sign up for a free Fastly account if you haven't already.
You'll need an API token to deploy your Compute app to the Fastly network:
- Go to Account > API tokens > Personal tokens.
- Click Create Token, then fill out the Create a Token fields as follows. If a field isn't specified, you can leave it as the default.
- Name: enter a name for your token
- Type Automation
- Role: Engineer
- Scope: Global (deselect the Read-only access box)
- Access: All services
- Expiration: Never expire
- Copy the token value and save it on your computer – you'll need it when you deploy your app.
Set up your developer environment
Setting up your developer environment will allow you to download a starter kit for Compute and adjust the code before deploying it to Fastly.
Create a new directory on your computer by opening a terminal window and entering the following command:
mkdir kv_hit_counter && cd kv_hit_counterRun the following command to install the Fastly CLI:
npm install @fastly/cliCreate a Fastly profile, entering the API token you copied from your account when prompted:
fastly profile create
HINT: You can authenticate in other ways, such as by including your token value with the CLI commands as --token or setting it as an environment variable named FASTLY_API_TOKEN.
Download the starter kit
We've created a starter kit specifically to use with this tutorial: Hit Counter starter kit.
Start a Compute project with the starter kit by passing its address to the
initcommand, then accepting the default options or entering your own project name, description, and author when prompted:fastly compute init --from=https://github.com/glitchdotcom/hit-counter/Install dependencies. We're using
npm, but you can useyarnif preferred:npm install
HINT: Include --accept-defaults with your Fastly CLI commands to accept the defaults instead of responding to each prompt.
Explore the hit counter app
Fastly will import the files for the app into your new directory. Take a minute to browse them in your developer environment.
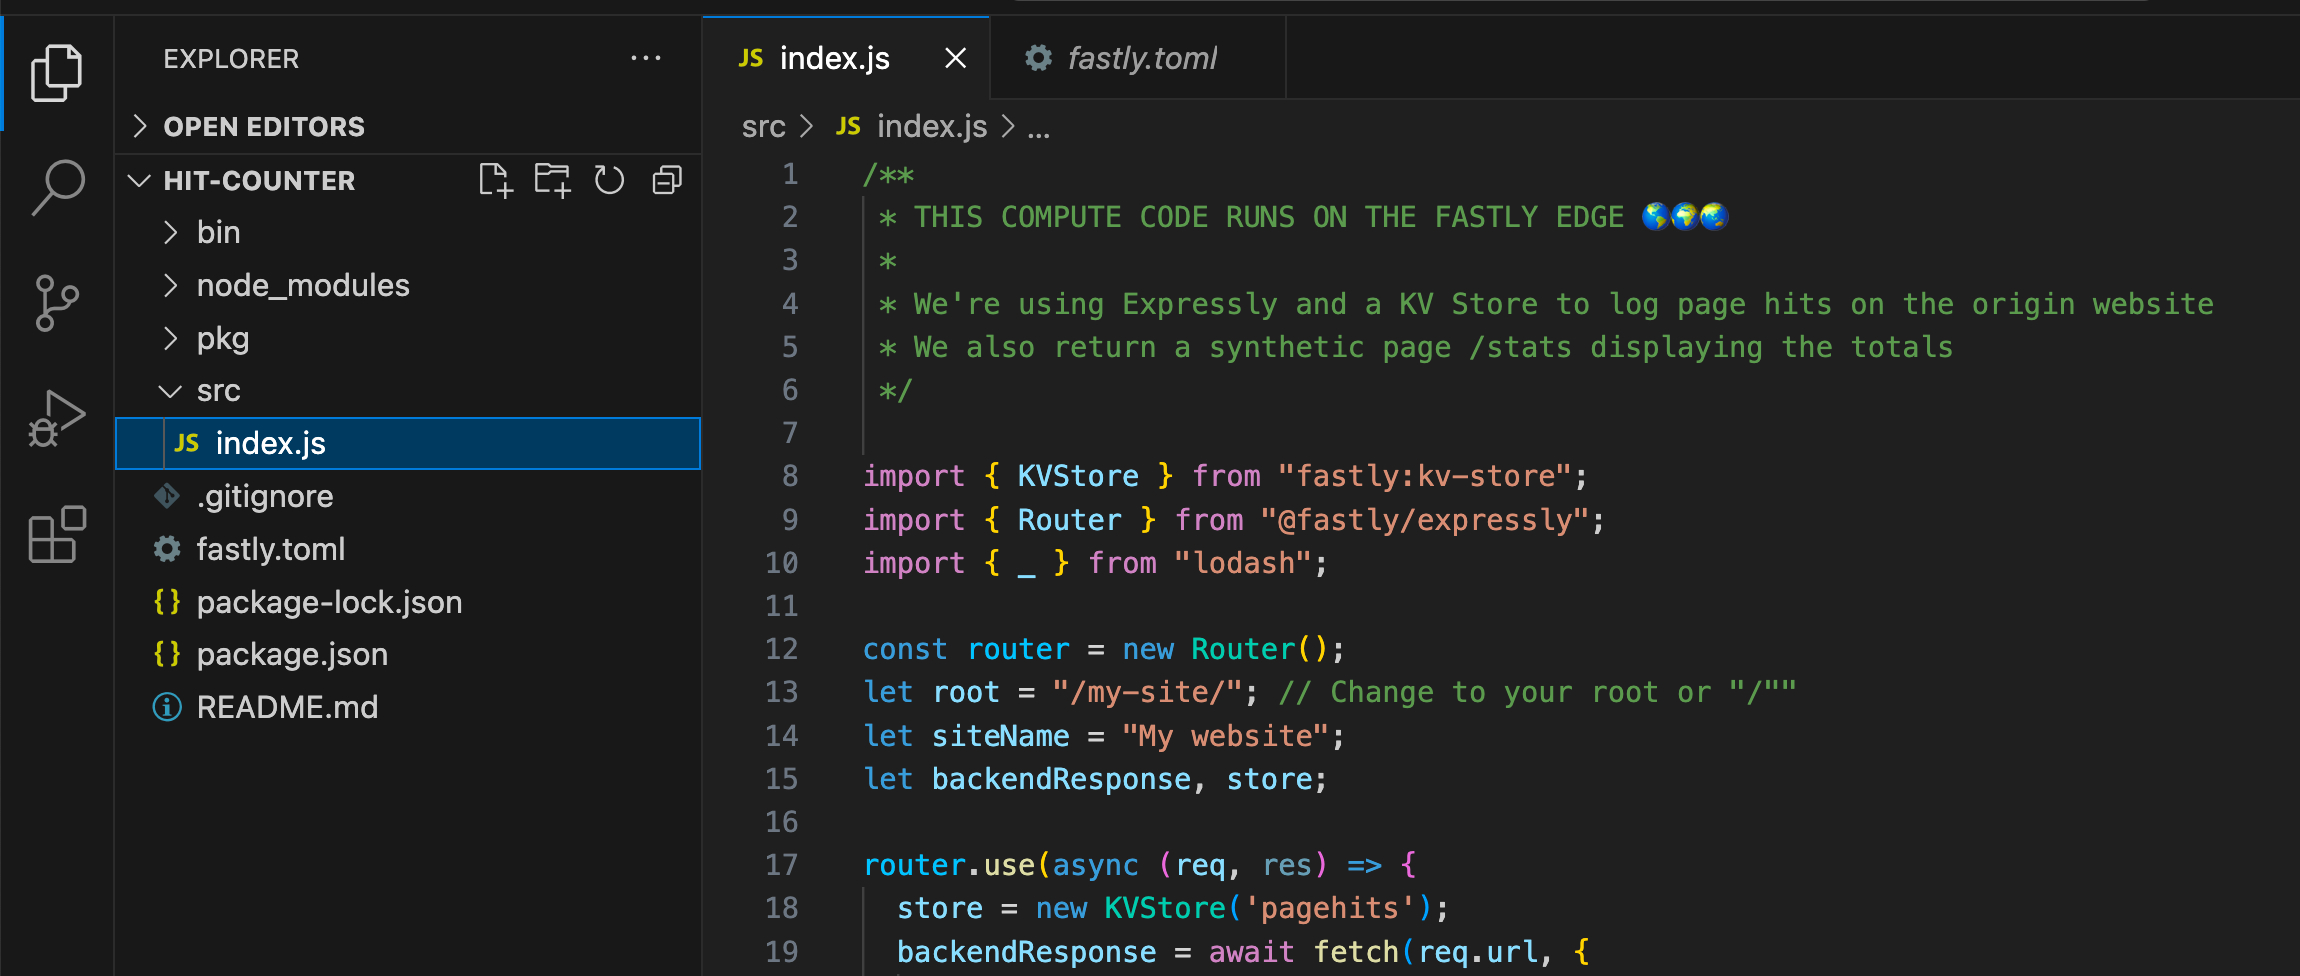
The starter kit includes the files necessary for the Fastly tooling to build and compile your app so that it can run on the Compute platform. Check out the following files:
package.jsonspecifies the Fastly dependencies including Expressly and scripts to build and run the app./src/index.jscontains the Compute logic – we'll dig into the structure below, but notice that it uses a similar outline to an Express server app, listening for requests and sending back responses, as well as logging hits to the KV Store. The script also builds a synthetic HTML page to display the stats for your site.fastly.tomlspecifies settings for our Compute service, including thebackend(which is our origin website) and a KV Store to create when we first deploy the app.NOTE: Trial and paid accounts include two KV stores. Make sure you're aware of the limitations applied to these included stores.
When we use Fastly CLI commands in the terminal window, the information in the Fastly TOML file is used to set up the service and build the JavaScript logic into Wasm to run fast and safely at the edge.
Edit the app to suit your website
You can compile and run the hit counter app straight away, but if you want to use your own origin website, take a minute to make a couple of necessary adjustments.
Open the
fastly.tomlfile and change thebackendaddress fromglitchdotcom.github.ioto your own origin website domain. Don't includehttps://or any paths or slashes, just the domain itself.For example, if your website is hosted at
https://example.com/my-blog/, useexample.comas thebackendaddress.IMPORTANT: Fastly will use the value in the TOML file when you first deploy, but if you want to change the
backendlater you have to use the CLI.Open the
/src/index.jsfile and change the value of therootdirectory to the root folder where your site is hosted or/if it's at the root of your domain.For example, if your website is hosted at
https://example.com/my-blog/, use/my-blog/as therootvariable.Update your styling code. In the
index.jsfile, navigate to thegetPagefunction at the end of the script. The code assumes a CSS file at/css/index.cssto match the 11ty example site. Change the link to the location of your own site CSS relative to the root.
HINT: If you cloned the sample site and deployed it to GitHub Pages, include your github.io domain in fastly.toml and the root of the site (the name of your cloned repository) in /src/index.js.
Deploy your app
In the terminal, deploy your app using the Fastly CLI publish command:
fastly compute publishYou can accept all of the default options when prompted, or make changes during deployment if you like:
- Respond
yfor the CLI to create a new Fastly service – you can change the service name from what's in the TOML if you like. - Choose your own domain for your deployed app (like
your-chosen-name.edgecompute.app) or enter to accept the default, which is randomly generated. - Change the Hostname or IP address if you want to use a different origin website (by default it's the
backendinfastly.toml). - Accept or change the port number.
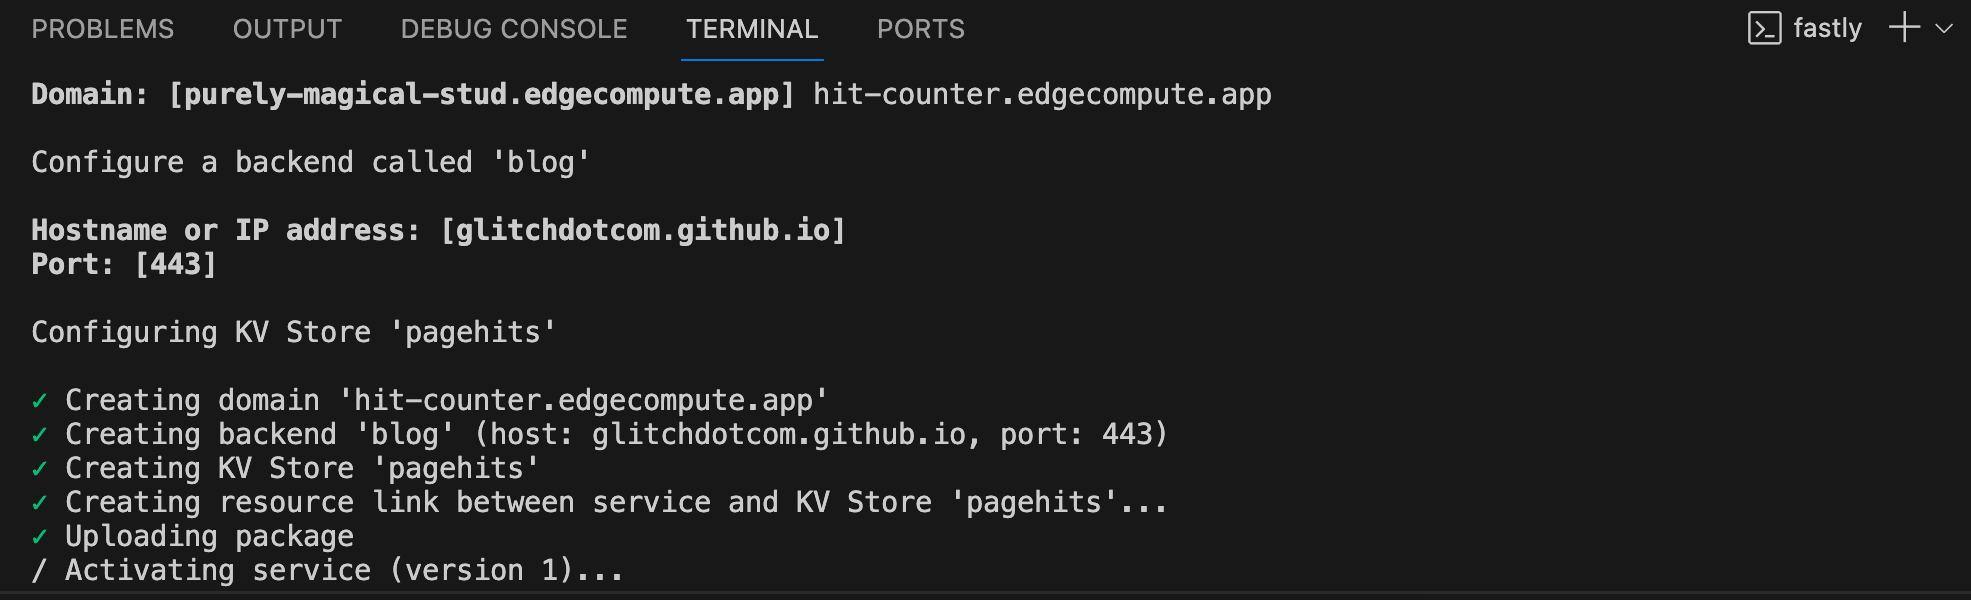
The Fastly CLI will build and deploy your Compute app. The terminal output will return the address of your new app, which will end edgecompute.app and have a subdomain Fastly auto-generates unless you specify something different.
Open your new app in the browser including the path you specified as your site root after the address in the terminal - otherwise, all you'll see is what's at the root of your domain. In the example code, the app is located at the /my-site/ path: hit-counter.edgecompute.app/my-site/
If it doesn’t load right away, give it a minute and try again.
IMPORTANT: Use fastly log-tail to instruct the CLI to output any errors to the terminal – you can also use console.log in your code to output info here.
Test your hit counter app
Check out your deployed app at its edgecompute.app domain. You should receive your origin website pages, and if you navigate to /stats/ your Compute app will return a list of pages that have had hits so far – check out the example: hit-counter.edgecompute.app/my-site/stats/
Click on a few pages and come back to the stats to check if they update!
NOTE: As you test, keep in mind that your browser cache may prevent the hits from incrementing 100% of the time.
Explore the code
Let's take a walk through the JavaScript code to learn more about what it's doing.
The Expressly library lets us use common routing patterns. We start by importing dependencies:
import { KVStore } from "fastly:kv-store";import { Router } from "@fastly/expressly";import { _ } from "lodash";
const router = new Router();let root = "/my-site/"; // Change to your root or "/"let siteName = "My website";let backendResponse, store;
Next we perform some request handling setup:
router.use(async (req, res) => { store = new KVStore('pagehits'); backendResponse = await fetch(req.url, { backend: "blog" });});The KV Store name matches the name in the TOML file (pagehits in the example code) – Fastly will create the store and attach it to the service on first deploy, so we can reference it by name in our app code.
We instruct Compute to fetch requests from the backend website also listed in the TOML, which is named blog in the starter kit because the example is an 11ty site.
router.get(`${root}stats`, async (req, res) => { let postList = await store.list({}); let totals = ``; /* The KV Store has page paths in the site as keys, and the number of hits as values Let's turn the list of keys into an array with the values like this: [{ page: "/", hits: 3 }, ...] */ postList = _.filter(postList.list, h => { return h.endsWith("/") }); //we only want pages ending / let hitList = []; for (const pst of postList) { let hits = await store.get(pst); let num = await hits.text(); hitList.push({ page: pst, hits: parseInt(num)}); } hitList = _.orderBy(hitList, 'hits', 'desc'); //let's order the list by hits to include in the page for (const pst of hitList) totals += `<p>🔗 <a href="${pst.page}">${pst.page}</a> – <strong>${pst.hits}</strong></p>`; res.withStatus(backendResponse.status).html(getPage("Page hits 📈📊🚀", totals));});Our stats page queries the KV Store data and returns a list of entries. We iterate through the entries and build an HTML string to represent them. We call the getPage helper function to make an HTML string we can send back to the user as a page.
let getPage = (title, content) => { return ` <!DOCTYPE html> <html> <head> <meta charset="UTF-8"> <meta name="viewport" content="width=device-width, initial-scale=1" /> <title>${title}</title> <!-- 🚧 Change CSS location to suit your site 🚧 --> <link rel="stylesheet" href="${root}css/index.css"/> </head> <body> <header><a class="home-link" href="${root}">${siteName}</a></header> <h2>${title}</h2> <div>${content}</div> </body> </html>`;}The HTML string includes the text we built in the request endpoint within the page body. Back in the stats endpoint we send this using the html method.
For all other routes, we log the current page and increment its number of hits in the KV Store, then return the origin response to the user.
router.all("(.*)", async (req, res) => { await incrementCount(req.path); res.send(backendResponse);});We use a helper function to increment the hit count, with the key as the page path and the value as the number of hits:
let incrementCount = async (page) => { const postRecord = await store.get(page); let count = 1; // Increase hits for this page if appropriate if (postRecord) { let postValue = await postRecord.text(); count = parseInt(postValue) + 1; } await store.put(page, count);}An example KV Store record would be something like this:
- Key:
/my-site/blog/fourthpost/ - Value:
7
WARNING: The hit counting might slow your response down a little bit as we wait for the KV Store operation to complete, so consider optimizing your Compute app processing if performance is a concern. Learn more about latency and cache with Fastly data stores.
Finally, we ask the router to listen for requests.
router.listen();HINT: Right now your hit counter functionality will only run when users access the site through the edgecompute.app address, but you can use it for all visitors if you have a domain you can send through your Fastly service.
Extend your app
Make an edit to your Compute app to learn what else you can do at the edge! You could change the content in the synthetic HTML page, or log different information to your data store.
Here's an example extension that works for the sample website. The Eleventy Base Blog returns an RSS feed of posts, and in our cloned version we've set the config to return it as JSON, which lets us carry out some processing on it at the edge. Let's turn it into an HTML page listing the posts in the feed, and use the KV Store data to include the number of hits for each page. Add the following route to your index.js script before the section that begins router.all("(.*)", async (req, res) => {:
router.get(`${root}feed/feed.json`, async (req, res) => { let originData = await backendResponse.json(); let posts = ``; for (const pst of originData.items) { let date = new Date(pst.date_published); date = date.toDateString(); let linkUrl = new URL(pst.url); let postRecord = await store.get(linkUrl.pathname); let postCount = 0; if (postRecord) postCount = await postRecord.text(); posts += `<p><a href="${linkUrl.pathname}"><strong>${pst.title}</strong></a> <br/>${date}<br/><em>${postCount} views</em></p>`; } res.withStatus(backendResponse.status).html(getPage(originData.title + " – Feed 🗞️", posts));});Build and deploy your app using the publish command again.
Like the stats page we built earlier, our feed page builds a synthetic HTML response. Here's an example of the feed running on a deployed service: 11ty-feed-hits.edgecompute.app/my-site/feed/feed.json

Fastly gives you access to lots of other information about the user request, so you could log additional data to your KV Store and render it in the stats page. Check out the docs for Expressly, KV Store in the JavaScript Compute SDK and the code examples for functionality you can build into your app.
What to try next
You can find your service and KV Store in the control panel for your Fastly account - to change the functionality, you’ll make your changes in a dev environment and build / deploy it again as above.
